Custom Bass Guitar
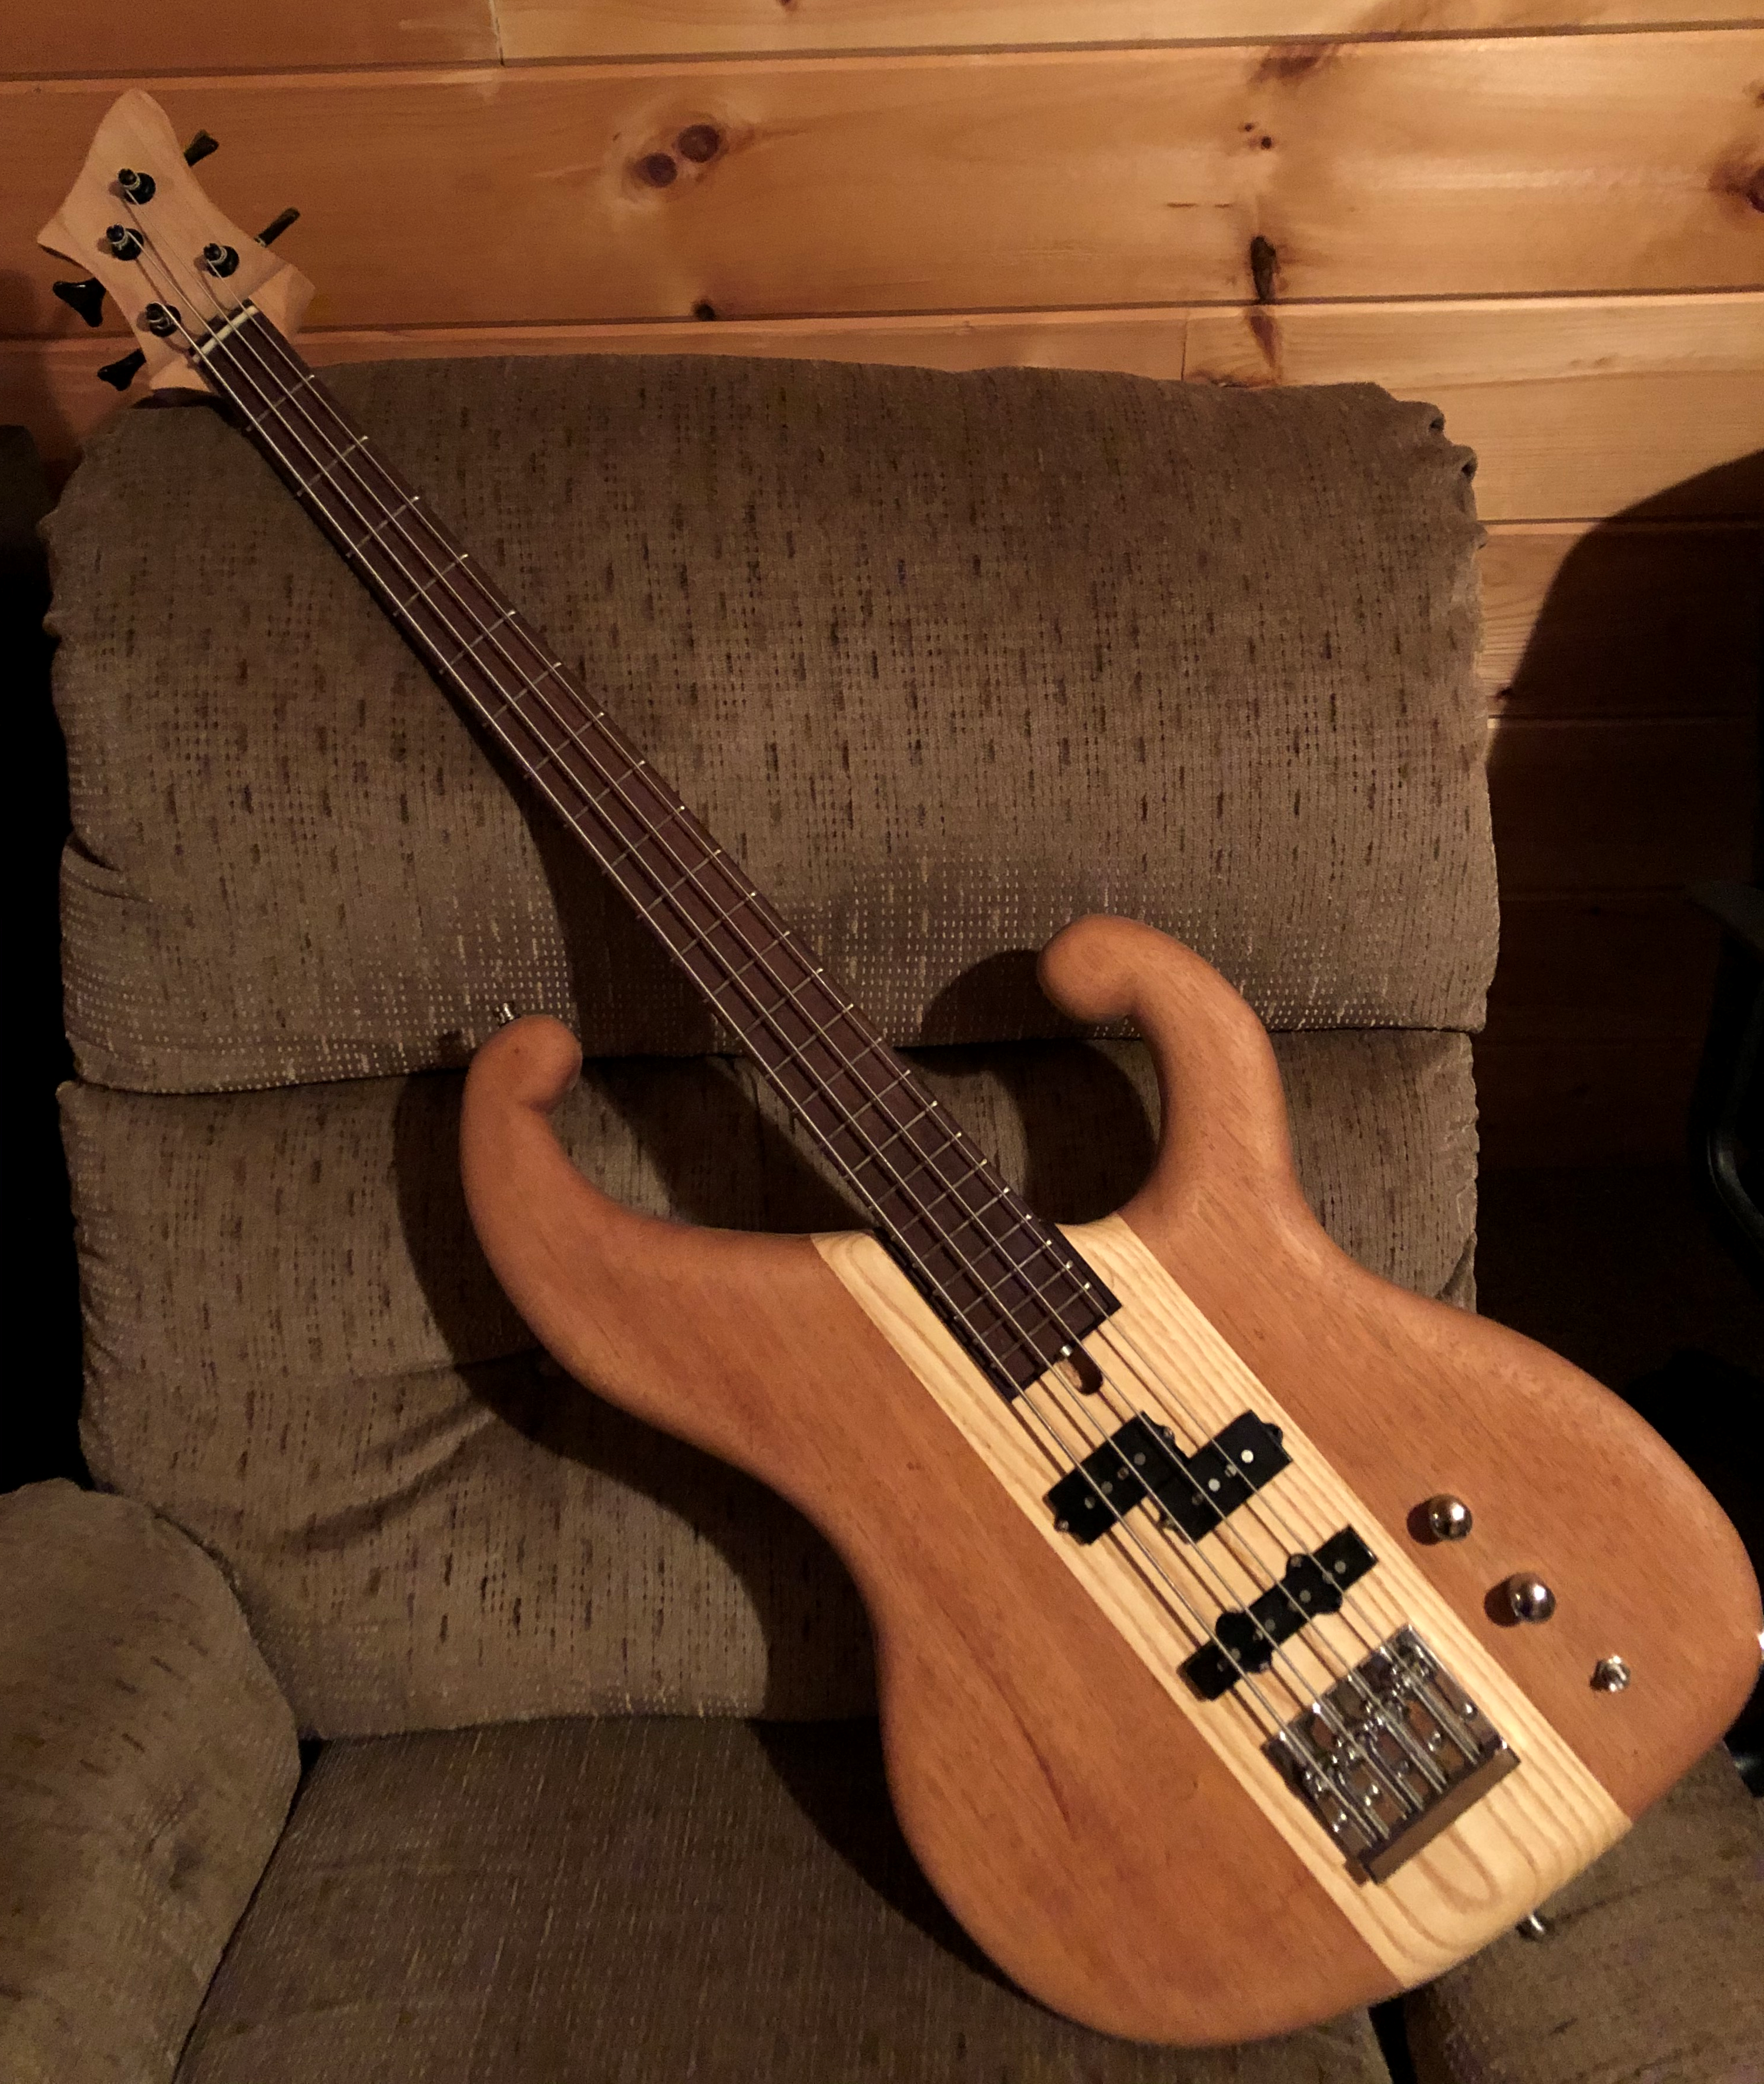
This project was started during the fall of 2019. Motivation for this build mainly came from the desire to challenge my fine wood working skills. My previous projects have honed my skills with large projects like bookshelves and desks. Here the most recent image of my guitar.
Design
Inpiration
This design was heavily inspired by the Fbass 40th Anniversary P/J bass guitar. Even though the design is seriously influenced by Fbass guitar, I made informed decisions on every part of the build including fret count, scale size, and overall dimensions.
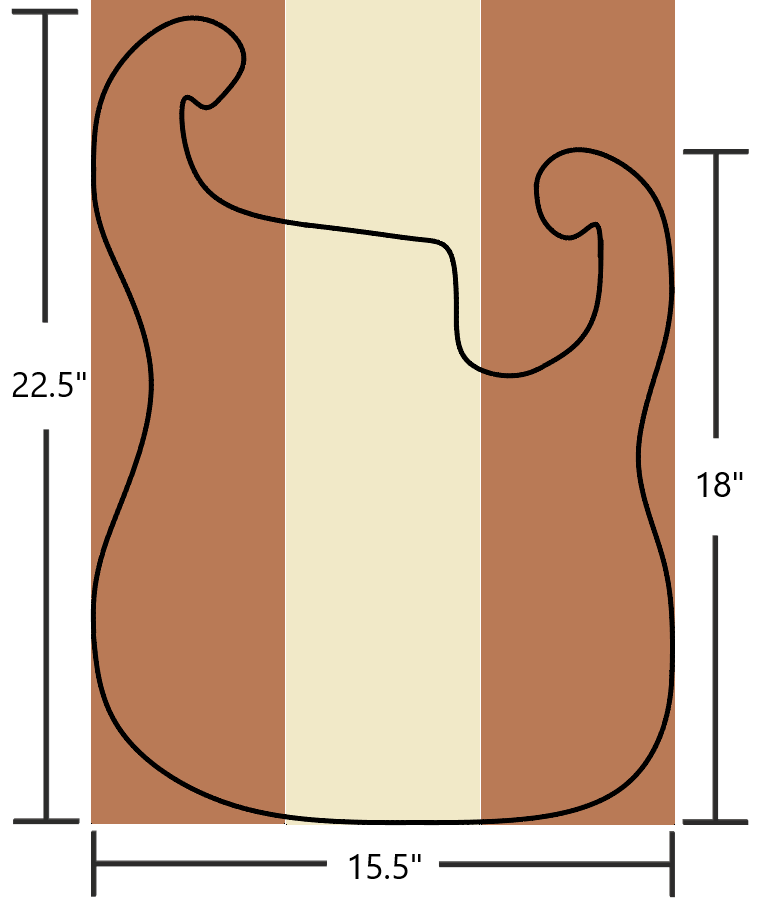
Design Specifications


Materials
- Body
- African Mahogany
- Northern Ash
- Neck
- Canadian Hard Maple
- Fret Board
- Mexican Royal Ebony (Katalox)
- Hardware
- Fender Yosemite Precision/Jazz Bass Pickup Set
- Greenten Bass Bone Nut - 42x3.2mm
- StewMac Hot Rod Low Profile - 24” 2-way Truss Rod
- Hipshot KickAss High-mass Bass Bridge
- Ernie Ball Regular Slinky Nickel Wound Strings (0.050-0.105 Thickness)
Construction
Rough Shaping
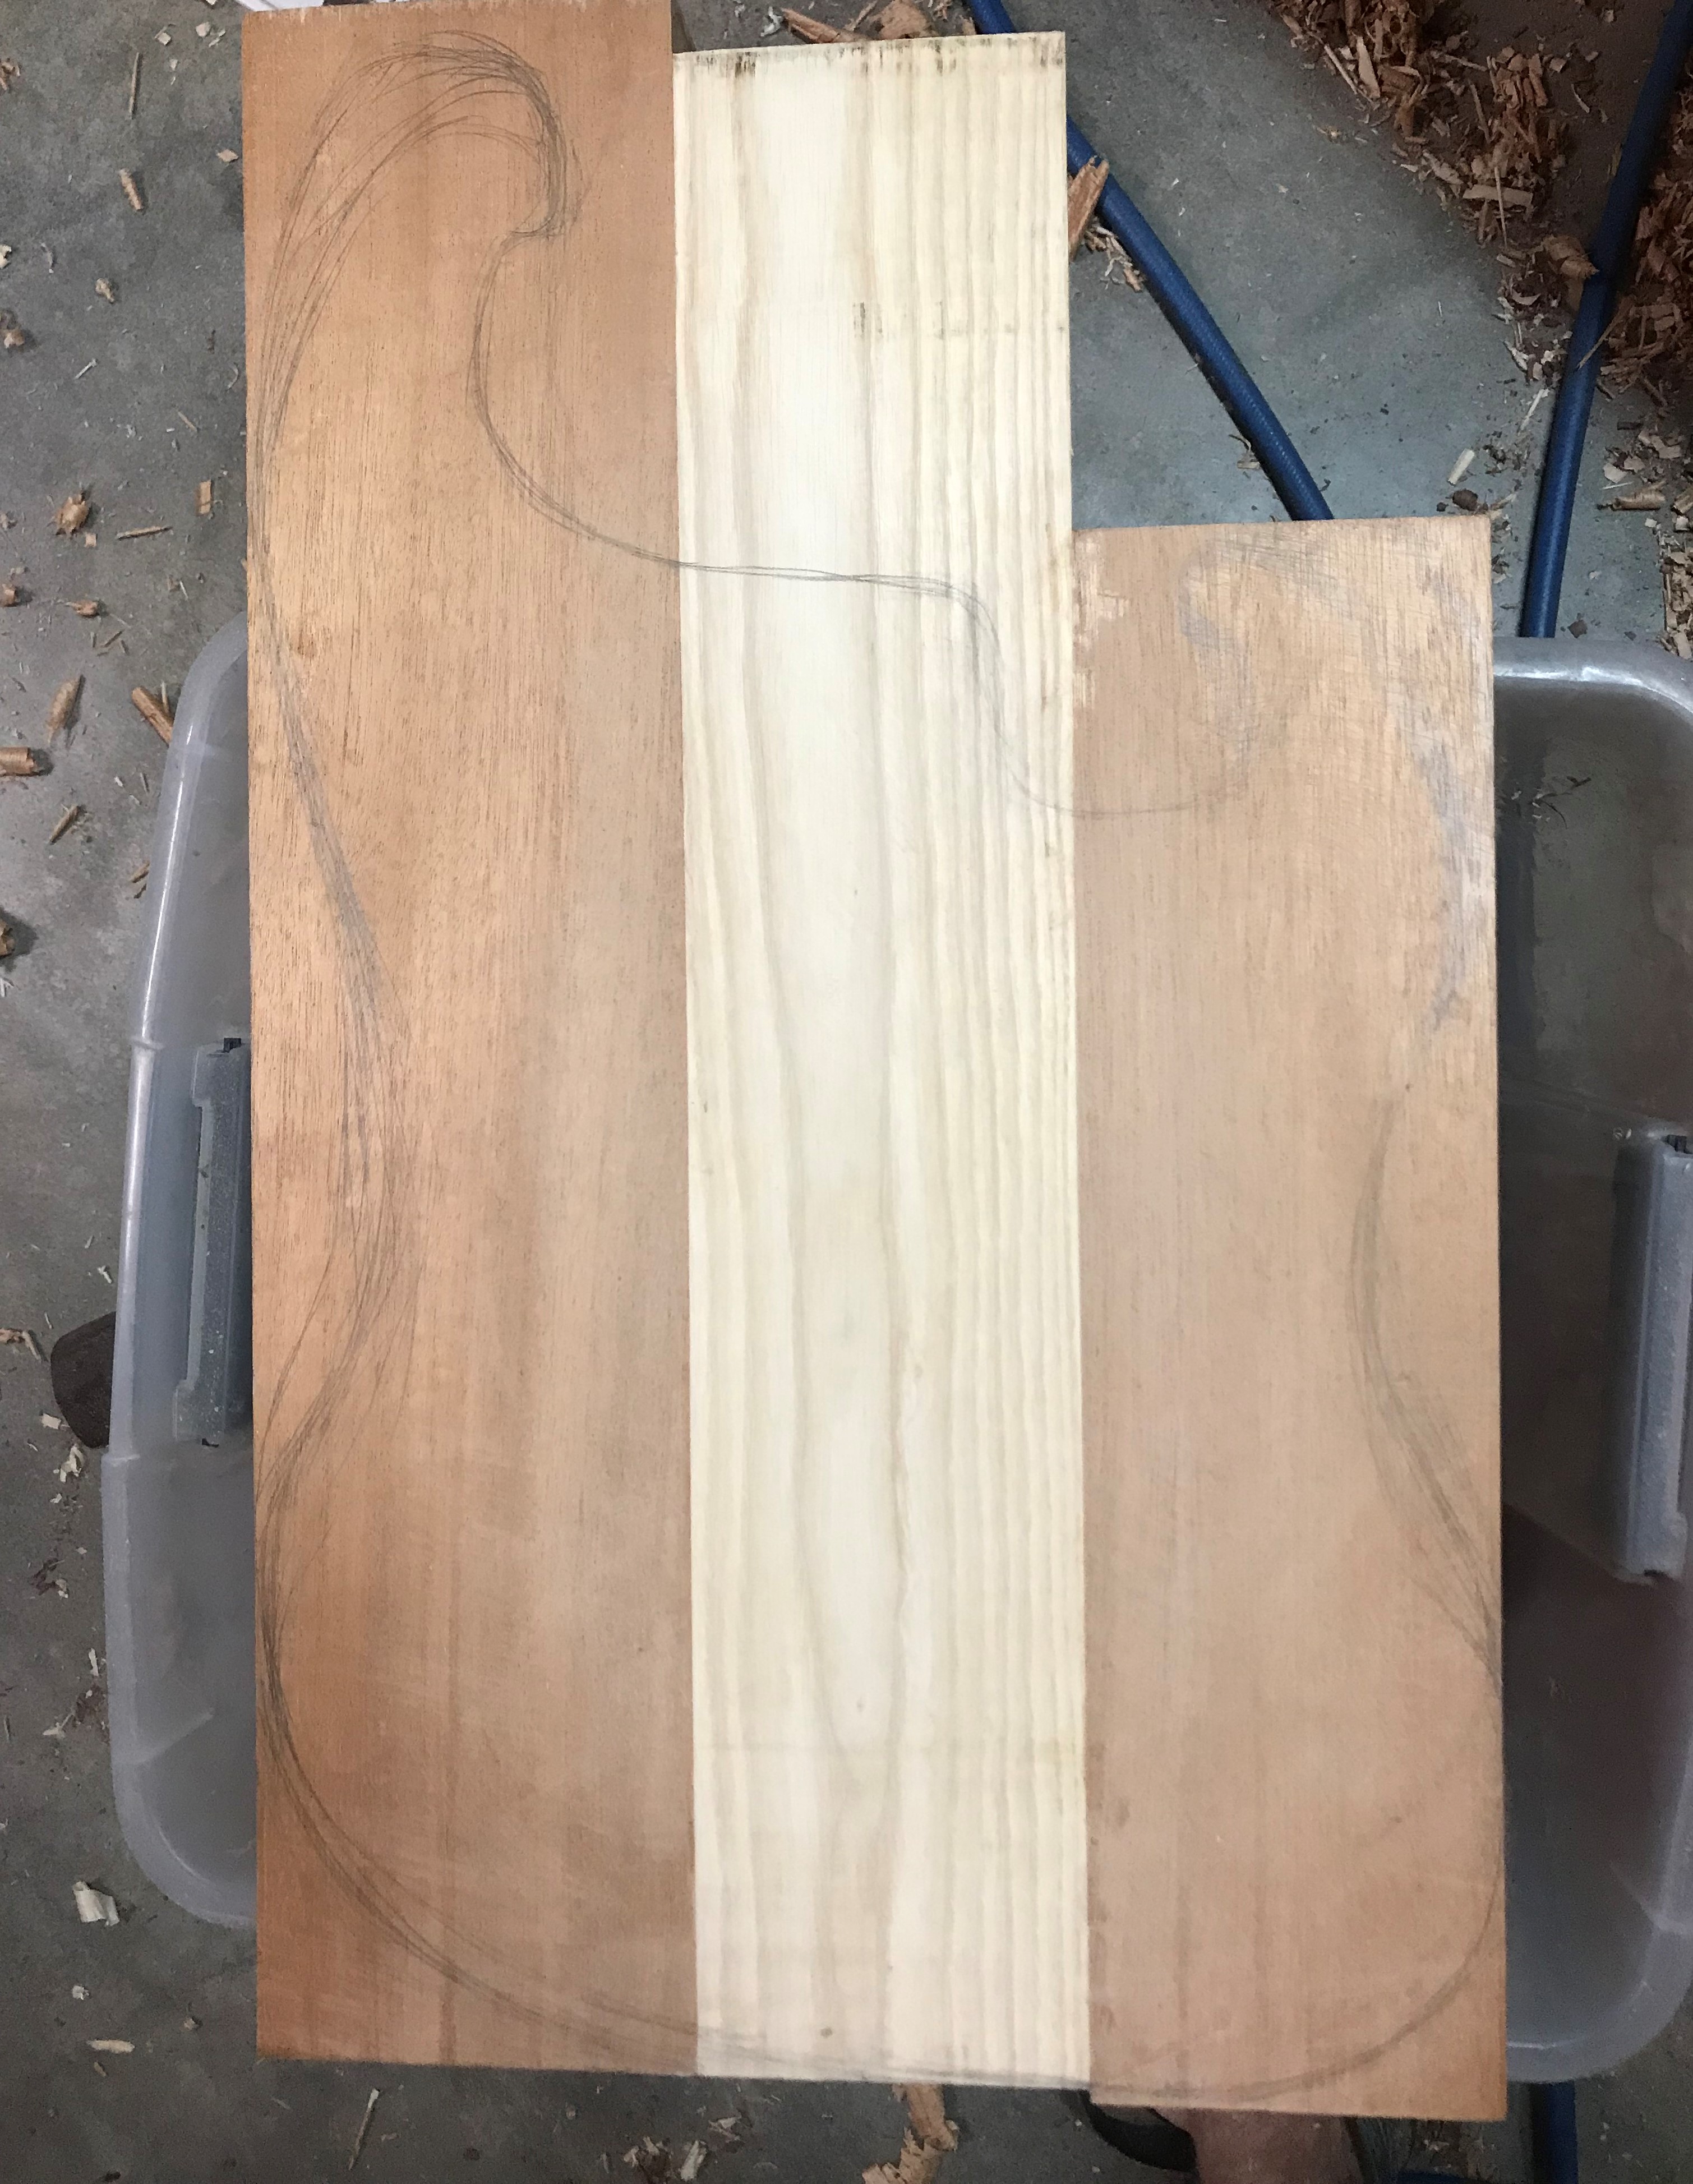
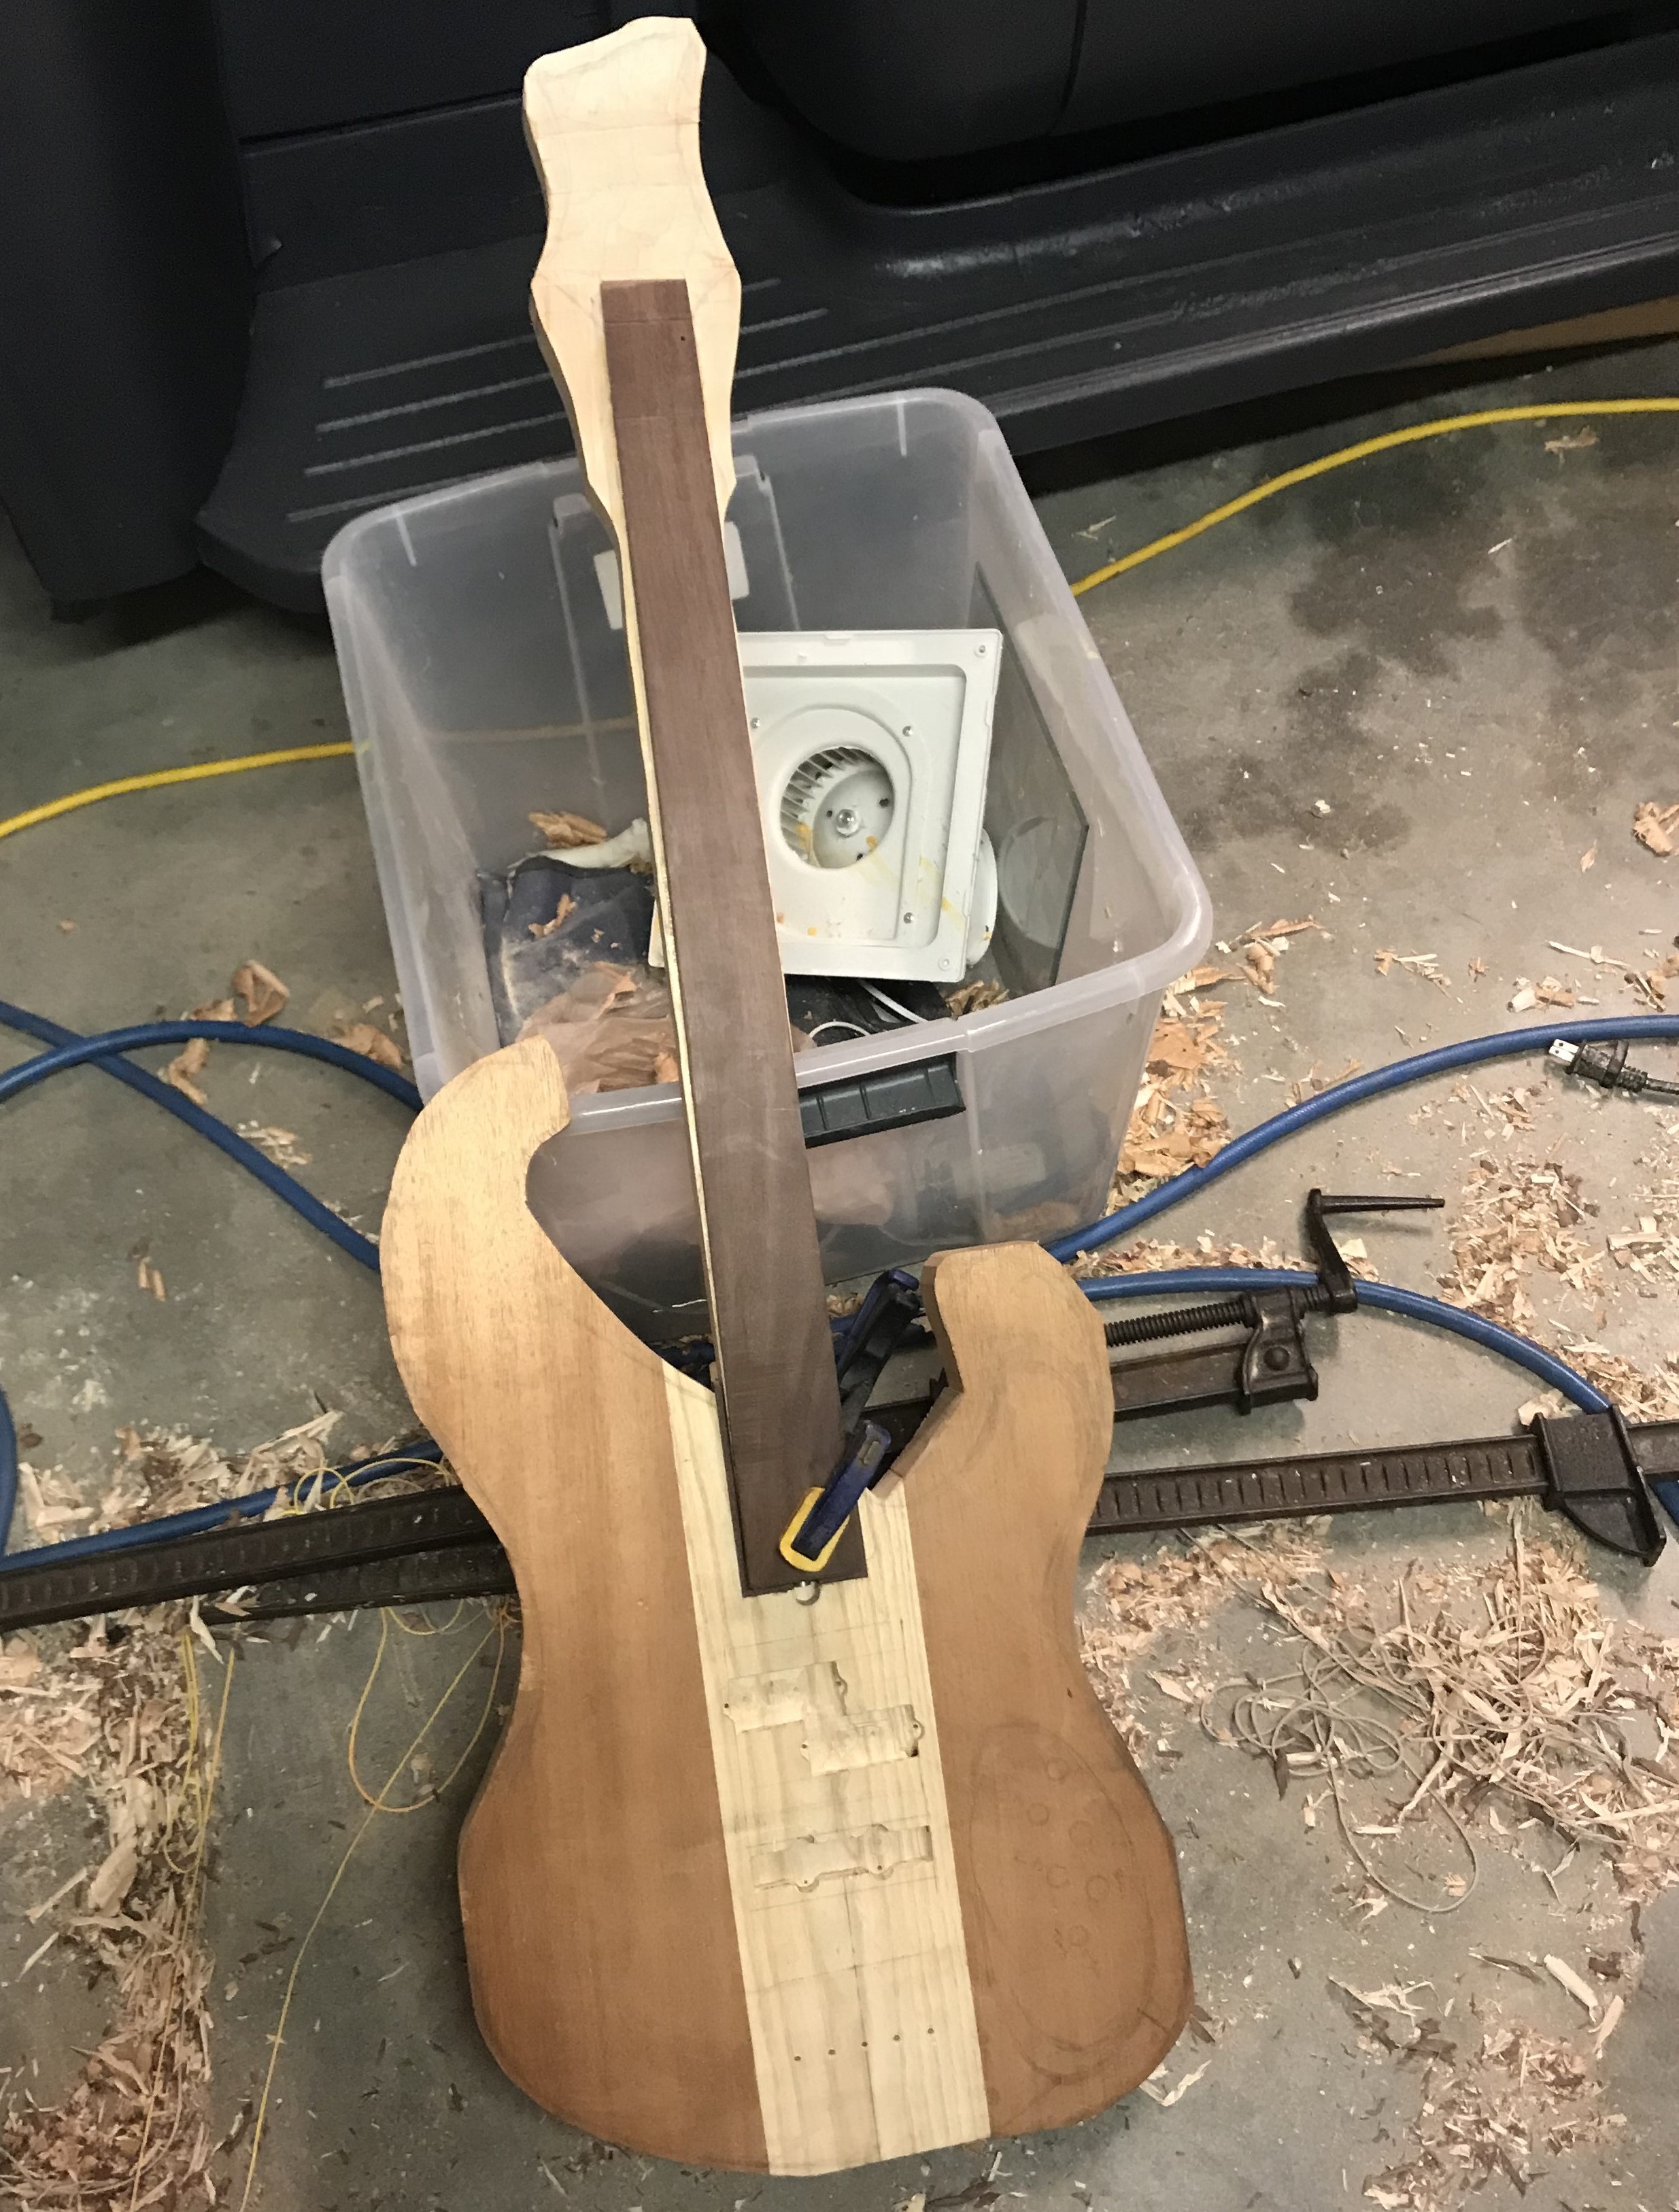
Using the rough stock for the body, the first step was creating flat faces so the wood could be glued together. This involved the use of wood plane and jointer. The result was three wood planks with flat and straight sides, each ready for the glueing process. A design was scribed to the body blank and shaped using the bandsaw. However, due to the tight curve designed for the arms on the body, a drum sander was required as well. Then came the rough shaping of the fretboard and neck. From a large stock the fret board was split using a bandsaw and a taper was applied.
Fine Shaping
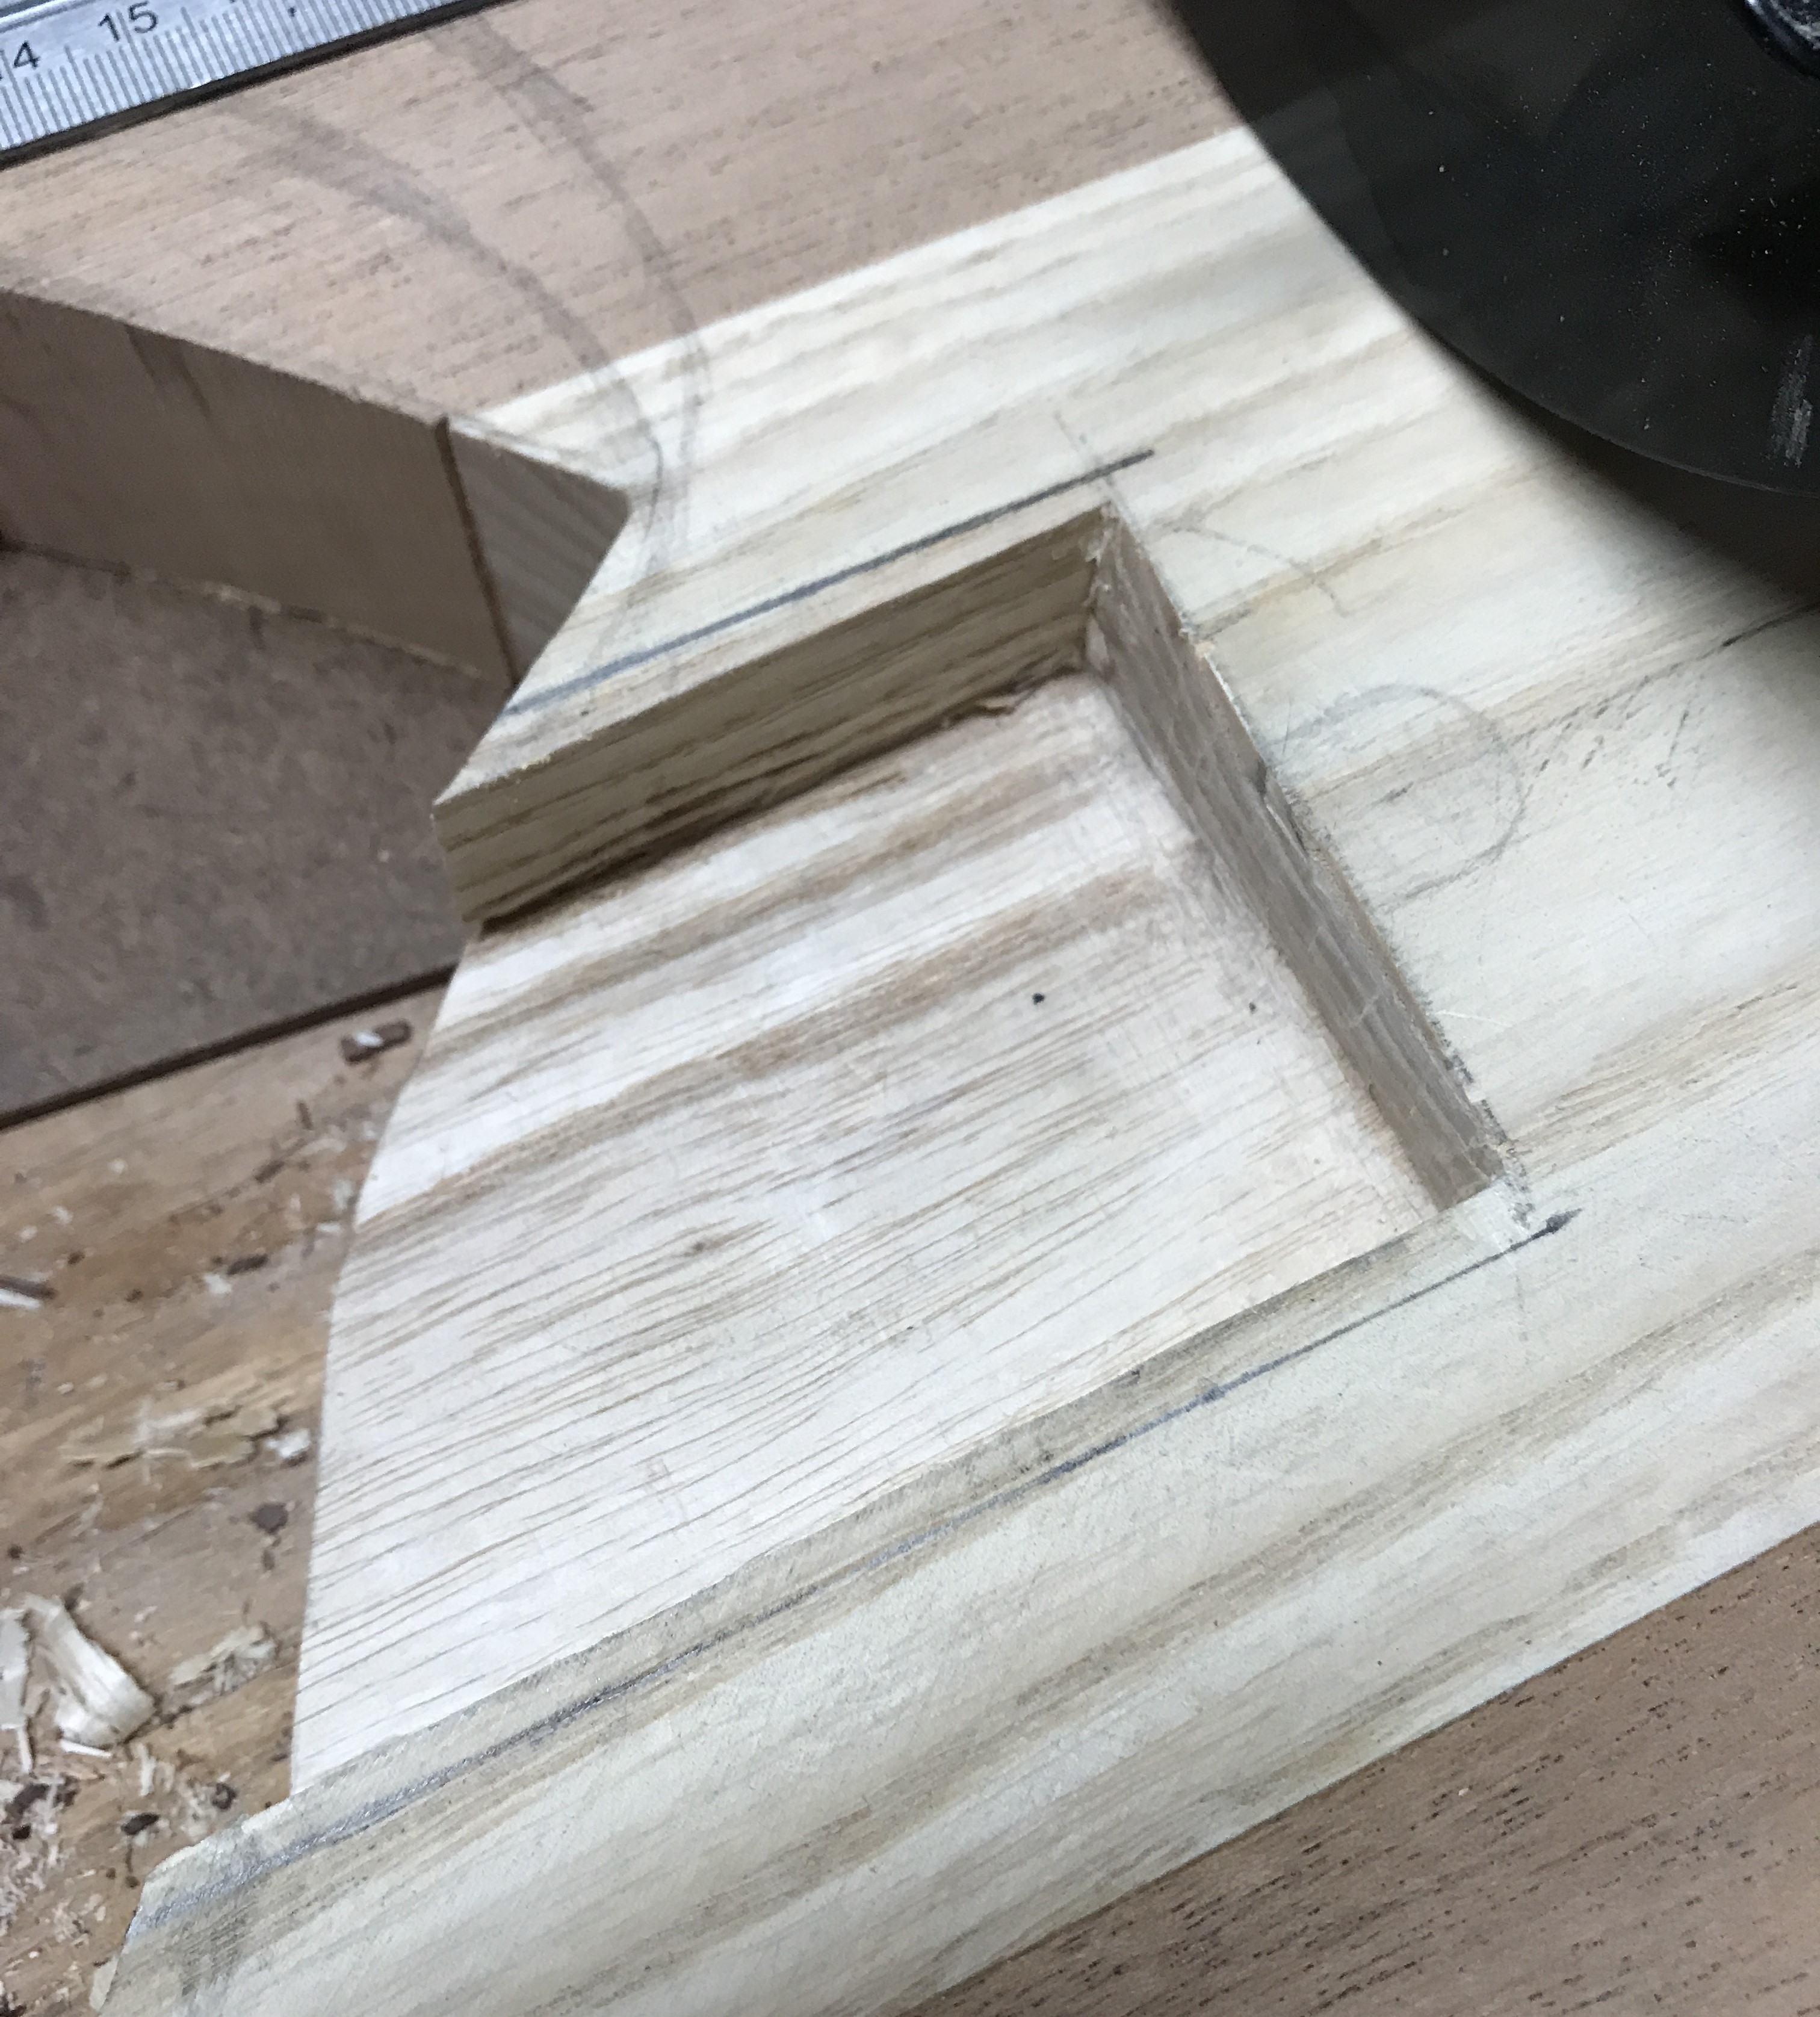
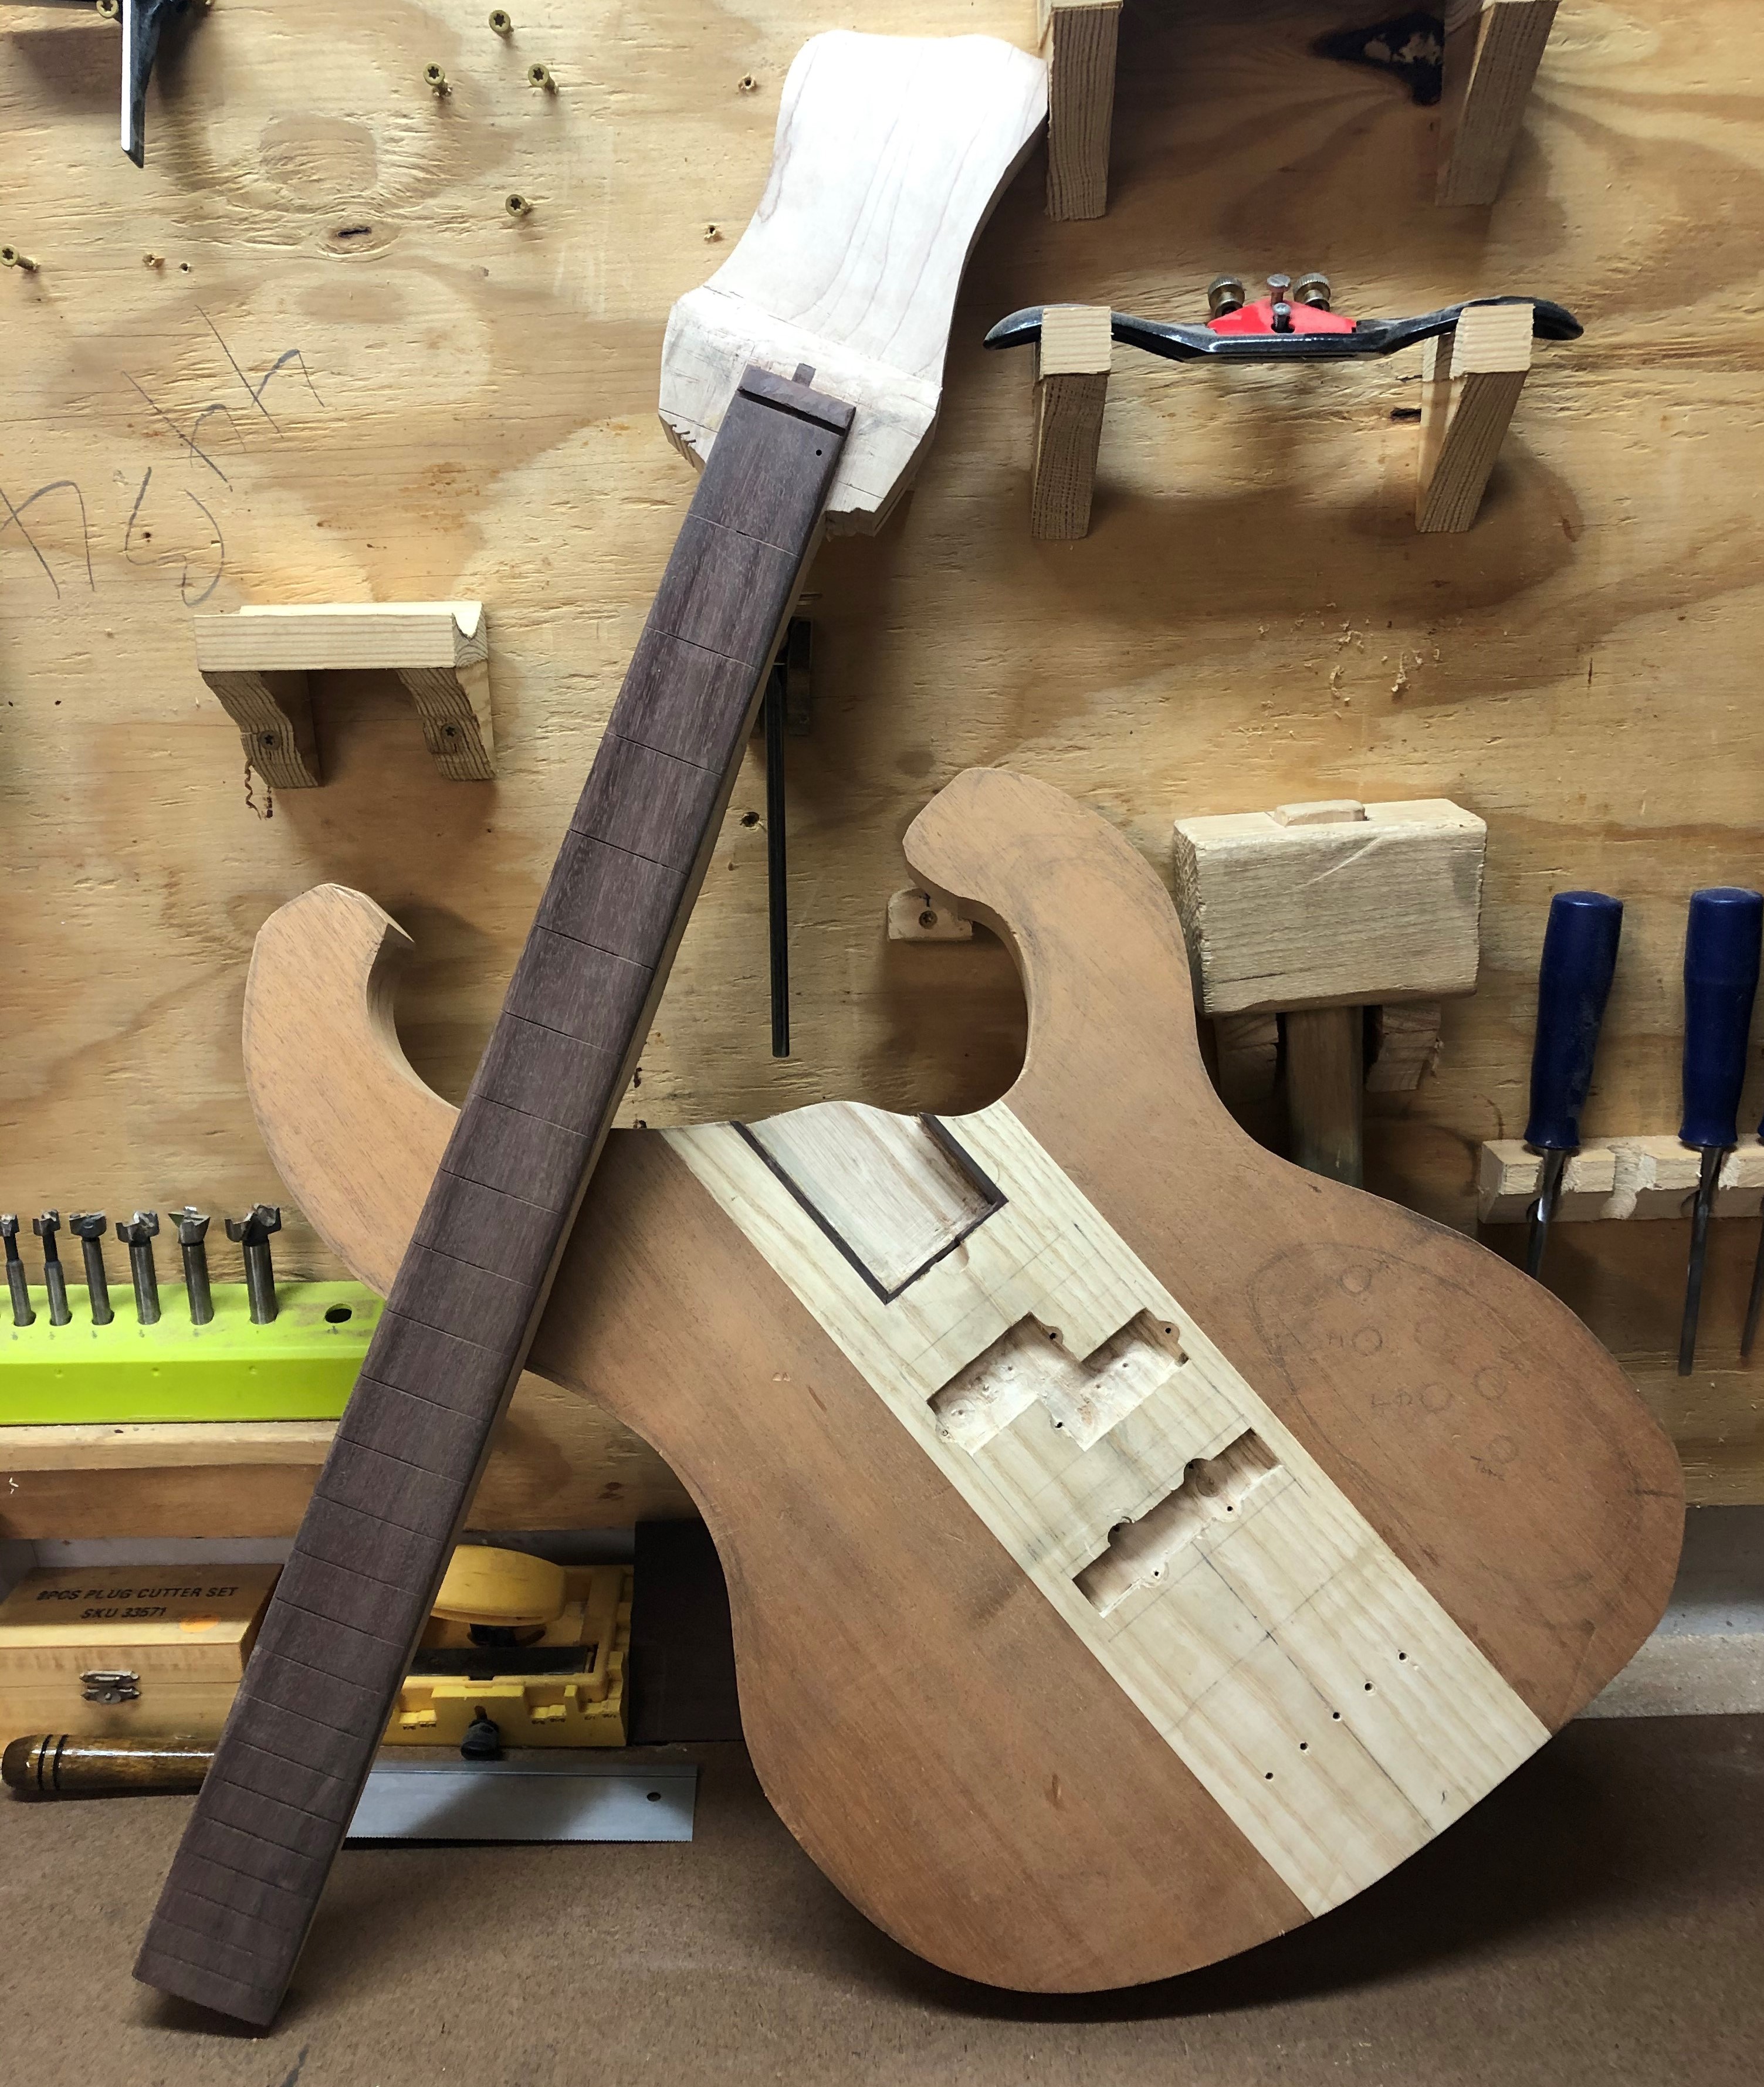
At this stage the body is shaped to Outlined in the design, the connection between the body and neck secured by a pocket where the base of the neck will rest, and fastened with wood screws and a brass backplate. The figure below shows the pocket for the neck, which was made with a router and refined using chisels for the corners.
Fret Installation
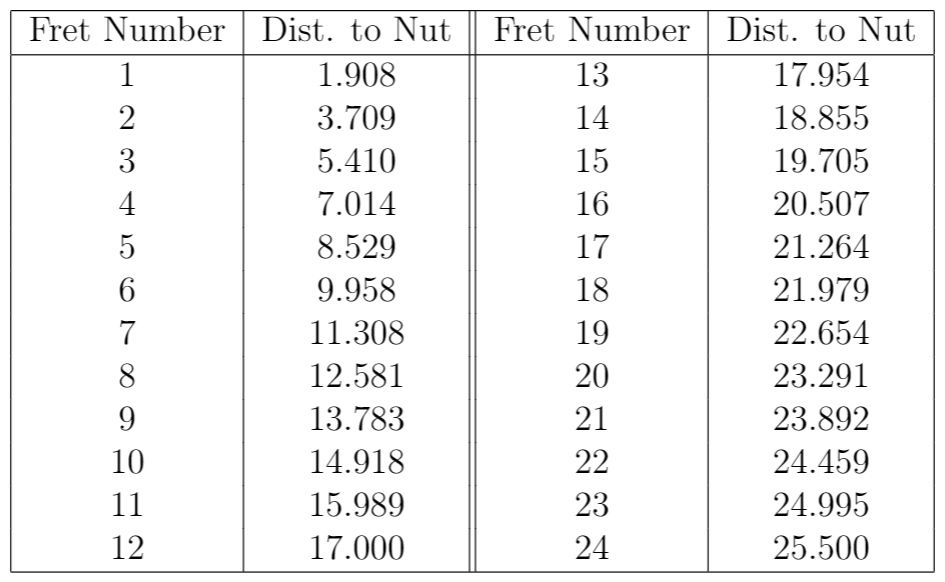
Installing the frets first requires the fret board to be prepared; a rounded and level surface with 0.024” wide cut slots to accept the fret wire.
To calculate where each fret slot needs to be made, we have the following formula defining the distance from the fretboard nut (zeroth fret):

Electronics
- Installing electronics: pickups, switches, audio jack.
- Soldering the circuit (just the pots and passive elements, currently no pre-amp still needs fabrication)
- Pre-amp Design Project
Project Review
This was overall a great success! Even though I made a lot of mistakes, most were addressed in a creative and pragmatic way. Considering this was my first time building a guitar or something of this quality, I can’t really complain, and will most definitely be revisiting this project to address my concerns.
Issues
- The highest frets, specifically 19 and 21, have slightly flat notes. This is the result of a compounding errors due to my scribing method. My calipers only have 12” range, so for scribing incremental steps were made along with a fairly precise tape measure. But due to this these frets are off the proper mark by about 1/16th of an inch creating the flat sounds.
Future Ideas
- Redo the finish for a more protective coat. The final layer should probably be Gun Oil so that the guitar does not require any future coats to maintain a protective coat, like it does with pure tung oil.
- Potentially refretting the entire fret board. If necessary, all the fret can be removed, and the fret board can be sanded flat again. If done I would build a jig for creating the frets due to the time and precision required last time. But hopefully just will refret the two problematic frets. The method chosen will determine on how far the frets need to move and if the refretting will show imperfections.
- Creating a steeper pitch for the neck (re-facing the back of the neck). Sometimes if pluck very hard the strings with begin to ring. However for most situations the current pitch is perfect.